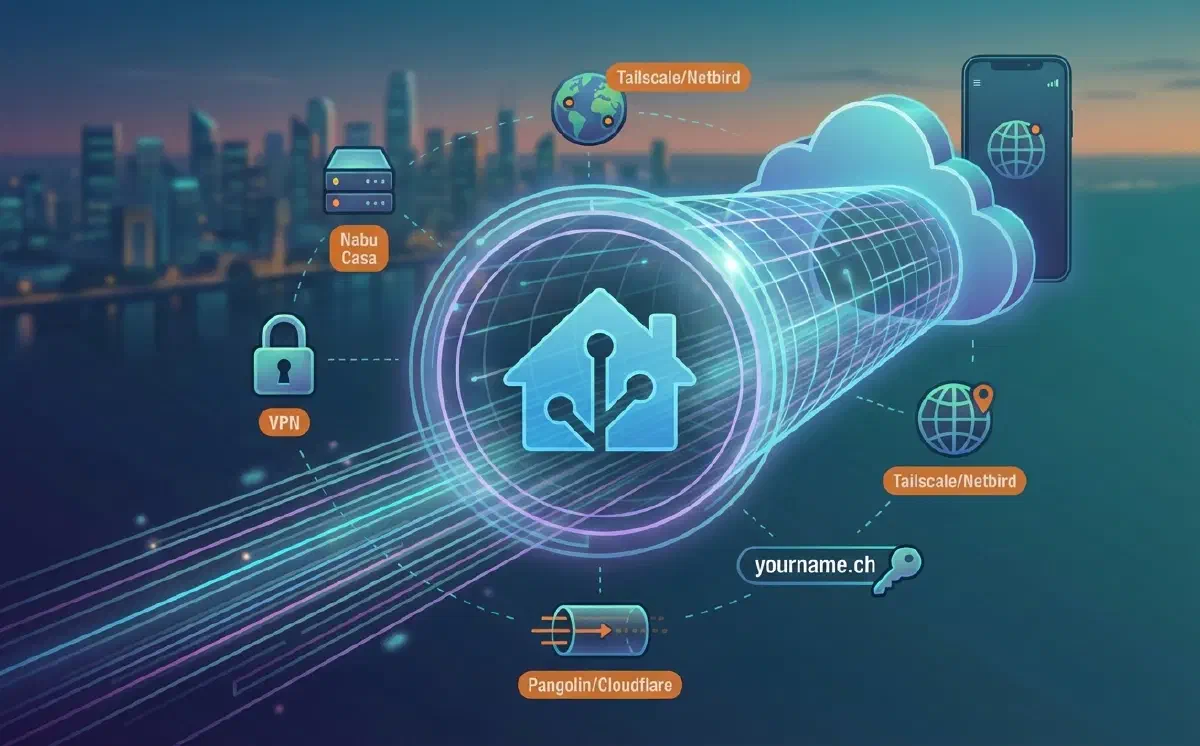
Having remote access to your Home Assistant instance is one of the first priorities when starting to design a smart home. But how do you create a secure connection? What are the costs and the limitations?
I have summarized several systems here that I have personally tested for remote access. Keep in mind that some methods require technical skills and may not be suitable for everyone.
Nabu Casa#
With a subscription to Nabu Casa for 75 EUR per year (prices updated as of January 2026), you get immediate and incredibly simple remote access. Beyond convenience, this service allows you to easily connect your home to Alexa or Google Assistant.
In my opinion, the added value is ethical: by subscribing, you directly fund the development of Home Assistant and other projects under the Open Home Foundation. I personally pay for the subscription to support the project, even though I don’t use remote access as my primary method.
Advantages
- Absolute simplicity: no technical knowledge required.
- Support the project: you fund the ongoing development of Home Assistant.
- Included extras: cloud backup space (max 5 GB) and multilingual support for Assist and TTS.
- Security: no configuration needed on your router or firewall.
Disadvantages
- Complex address: the generated link is long and hard to remember (it can be customized with your own domain, but that requires technical skills).
- Exposure: HA is still visible on the internet.
Tailscale or Netbird#
Moving slightly up in complexity, we find these solutions that still don’t require touching your router. Tailscale and Netbird create a virtual private network (VPN) between your devices without the need for open ports, thanks to a technology called NAT traversal.
Tailscale is the most intuitive to configure. Netbird, on the other hand, is a European open-source project that offers an excellent self-hosting solution.
Advantages
- Zero configuration: no need to touch router or firewall settings.
- Total privacy: the system remains local and is not publicly visible on the internet.
- Extended access: you can also reach other devices on your network (via subnet router).
- HTTPS: with Tailscale, you can easily set up a secure internal domain.
Disadvantages
- Software required: you must install an app on every device (inconvenient for locked-down work computers).
- User limits: free plans usually limit sharing to a small number of users (typically a maximum of 5).
Personal Domain or Dynamic DNS#
This is the “classic” solution: purchasing a domain (e.g., .it, .ch, .com) or using a Dynamic DNS (DDNS) service, which is ideal if you don’t have a static public IP address.
Having a personal domain makes everything more professional and fun. Costs are low: a .ch domain costs about 10 CHF per year (less than 1 CHF per month). For purchases, I suggest services like Porkbun or Infomaniak.
Advantages
- Professional solution: you use a name that is easy to remember.
- Versatility: you can use the same domain for other services (Jellyfin, Nextcloud, etc.) with
HTTPScertificates. - Accessibility: all you need is a browser, with no extra apps to install.
Disadvantages
- Technical difficulty: requires knowledge of DNS, routing, and firewalls.
- Requirements: you need a public IP address (IPv4 or IPv6, it doesn’t have to be static).
- Security: you expose Home Assistant directly to the web (using a reverse proxy and protection systems like Traefik and Crowdsec is highly recommended).
VPN (Traditional)#
A traditional VPN (OpenVPN or Wireguard) is the ideal choice for those who want total control without exposing Home Assistant to the internet. Wireguard, in particular, offers excellent performance, though it can sometimes be blocked on highly restrictive public Wi-Fi networks.
Advantages
- Maximum security: no services are publicly exposed.
- Total control: you manage all network traffic yourself.
Disadvantages
- Complex setup: requires a VPN server (often built into the router) and a public IP.
- Corporate barriers: it is often impossible to connect from office computers due to administrative blocks.
Pangolin or Cloudflare Tunnel#
If your connection is behind a CGNAT (meaning you don’t have a public IP, a common situation with certain ISPs), these solutions are your lifesaver. Local software creates a secure tunnel to an external server reachable by anyone.
Cloudflare Tunnel is the most well-known, but it has its limits. My preference goes to Pangolin: it is open-source, supports self-hosting, and allows you to manage TCP/UDP traffic as well, not just web (HTTP).
Advantages
- Beyond CGNAT: works even without a public IP and without opening ports on your router/firewall.
- Extra security: allows you to add a second layer of authentication (PIN, password, additional login).
- Automatic certificates: automatically manages HTTPS and masks your home IP address.
Disadvantages
- VPS costs: requires a small external virtual private server (VPS) for self-hosting (approx. 3 CHF per month).
- Maintenance: the VPS must be updated and managed.
Conclusion#
Every method has its strengths. My basic advice is to support Nabu Casa anyway to ensure the future of Home Assistant. In parallel, getting a personal domain is an excellent investment for elegantly managing all your services (Immich, Nextcloud, etc.).
Here is my ranking, from the simplest solution to the most complex:
- Nabu Casa Subscription (with an optional custom domain).
- Access via VPN / Tailscale / Netbird (for those seeking maximum privacy).
- Pangolin (for those without a public IP who still want standard web access).
I currently use Pangolin because I do not have a public IP address and I need to access Home Assistant from my work computer, where I cannot install extra software or VPNs.