The air we breathe at home or in the office is crucial for our well-being and productivity. Often, however, indoor air quality can be affected by factors such as excess carbon dioxide (CO2), which leads to drowsiness and difficulty concentrating. For a while, I looked for a solution to monitor the air in my home office, but commercial options were often expensive and not flexible enough to integrate with my Home Assistant setup.
Then, almost by chance, the “revelation”! I stumbled upon the Sensirion SCD40 sensor. This little gem promised to measure CO2, temperature, and humidity. I know that air quality includes many other parameters, but starting with these three fundamental data points is an excellent starting point for a general overview.
The smart heart: ESP32-C3 and ESPHome#
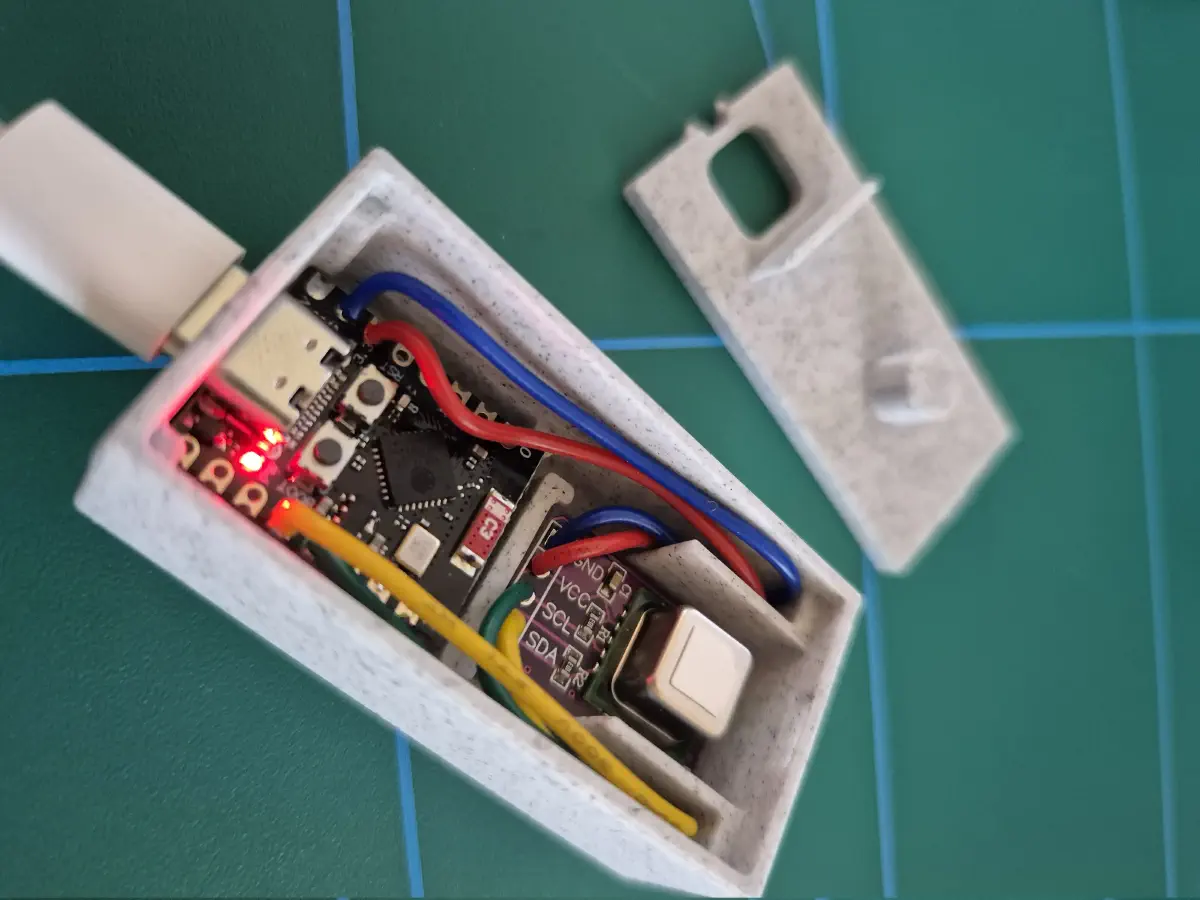
A sensor alone is not enough. To make it truly integrable into my smart ecosystem, I decided to connect it to an ESP32-C3, specifically its “supermini” version, incredibly compact and powerful. The “programming” (and here the quotation marks are a must, given the simplicity) was entrusted to ESPHome, a fantastic tool that allows you to configure ESP-based IoT devices with disarming ease, without having to write a single line of C++ code.
Simple and fast connections#
To make it all work, just a few connections are enough. Here’s the essential diagram:
| SCD40 | ESP32-C3 | Description |
|---|---|---|
| GND | GND | Ground |
| VDD | 3.3V | Power (3.3 Volt) |
| SCL | GPIO 9 | I2C clock line |
| SDA | GPIO 8 | I2C data line |
ESPHome configuration: few steps for great results#
The real magic happens with ESPHome configuration. This is where we define how the sensor interfaces with the ESP32-C3 and how the data will be exposed to Home Assistant. Here is the YAML configuration file I used:
esphome:
  name: qualita-aria
  friendly_name: Qualità aria
  min_version: 2024.11.0 # Make sure you have a recent version of ESPHome
  name_add_mac_suffix: false # For a clean name in Home Assistant

esp32:
  board: esp32-c3-devkitm-1
  framework:
    type: esp-idf # The preferred framework for ESP32-C3

# Enable logging for debugging
logger:

# Enable Home Assistant API for direct integration
api:

# Allows Over-The-Air (OTA) firmware updates
ota:
  - platform: esphome

# Wi-Fi configuration (credentials are hidden for security)
wifi:
  ssid: !secret wifi_ssid
  password: !secret wifi_password

# I2C bus configuration
i2c:
  sda: GPIO8 # Sensor SDA pin
  scl: GPIO9 # Sensor SCL pin
  scan: true # Scan for I2C devices at boot
  id: bus_a # I2C bus identifier

# Definition of SCD4x sensors
sensor:
  - platform: scd4x
    co2:
      name: "CO2" # More descriptive name for Home Assistant
    temperature:
      name: "Temperatura"
    humidity:
      name: "Umidità"
    # Altitude compensation for more accurate CO2 measurements
    altitude_compensation: "320m" # Replace with the altitude of your area!
With this configuration, in a few moments you will have all the values read by the sensor available directly in Home Assistant, ready to be displayed, automated, or used in any way you desire.
A touch of professionalism: the 3D printed enclosure#
Of course, a “naked” sensor and an ESP connected with loose wires might look a bit too “artisanal”. To give the project a more refined appearance, I thought about an enclosure.
Thanks to the 3D models available on GrabCAD (for the ESP32-C3 supermini and the SCD40), I was able to design and iterate a custom enclosure. The result is a functional case, printable with a home 3D printer in minutes.
You can find all the enclosure files (base and lid) on Printables: Case for SCD40 and ESP32-C3.
This small DIY project provided me with a fully integrated and customizable air monitoring solution, just the way I like it! Let me know if you have tried to create a similar project or if you have any questions!


